
You have a website. You publish content, invest in advertising, or simply want to know if anyone visits it. But without data, you're making decisions blind. Google Analytics is Google's free tool that tells you exactly what's happening on your site: how many people visit, where they come from, which pages they stay on, and when they leave.
In this guide I'll walk you through setting it up step by step, designed for someone who has never touched web analytics before. By the end you'll have real data from your website flowing in.
What is Google Analytics and what is it for
Google Analytics is a free web measurement tool. You install it on your site once, and from that moment on it records every visit: what device the visitor uses, which page they landed on first, how long they stayed, whether they came back, which channel brought them (Google, Instagram, email, direct) and much more.
The current version is called GA4 (Google Analytics 4) and it's the one you should install if you're starting now. It's more powerful than the previous version, event-based, and directly integrates with Google Ads and Search Console.
Before you start: what you need
- A Gmail or Google account (free)
- Access to your website's admin panel (WordPress, Wix, Squarespace, or the source code if it's a custom website)
- 10 uninterrupted minutes
You don't need to know how to code. Google Analytics has native connectors for almost every content management system on the market. If your website runs on WordPress, you can have it working in 3 clicks.
Step 1: Create your Google Analytics account
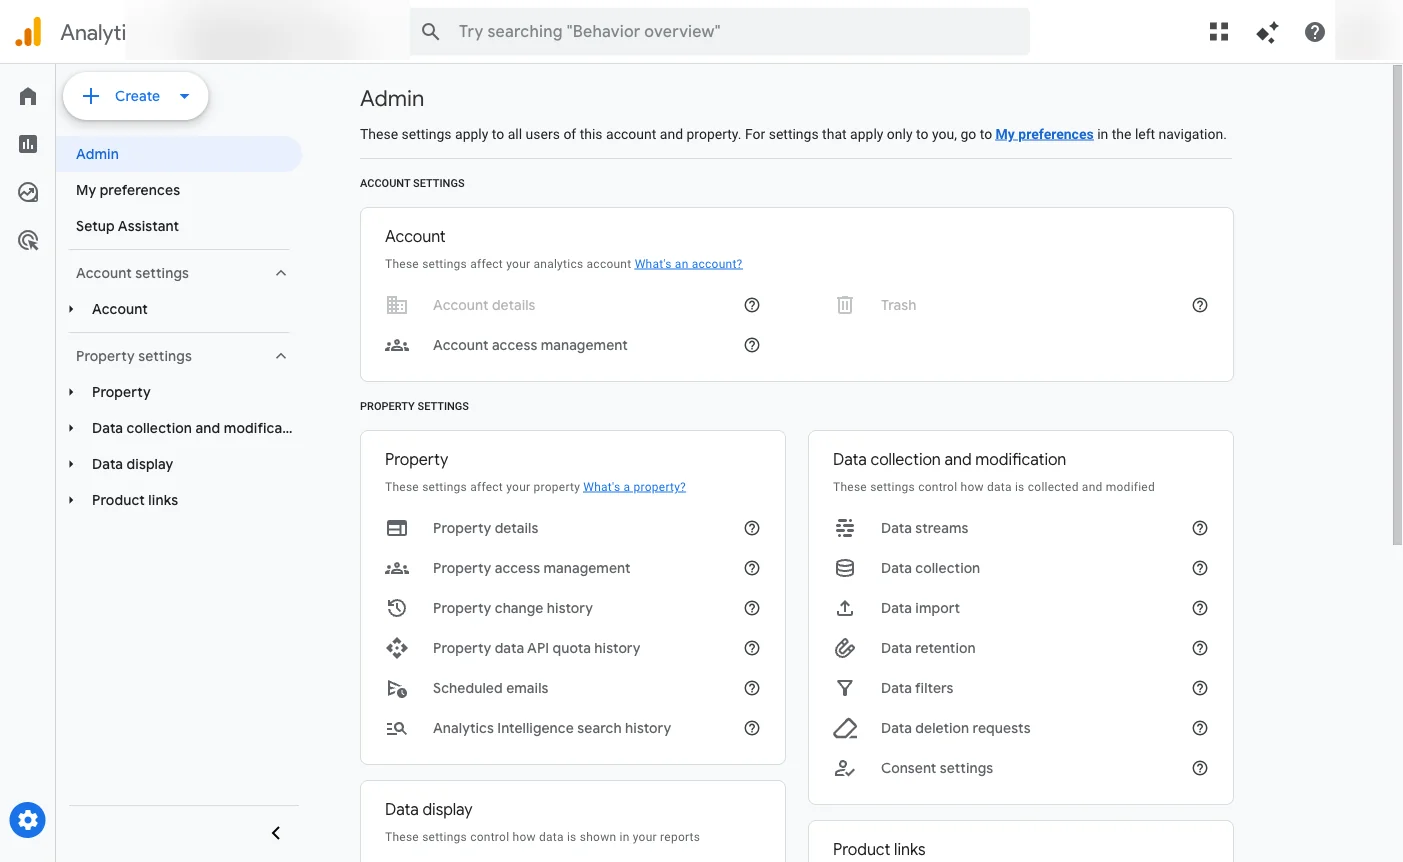
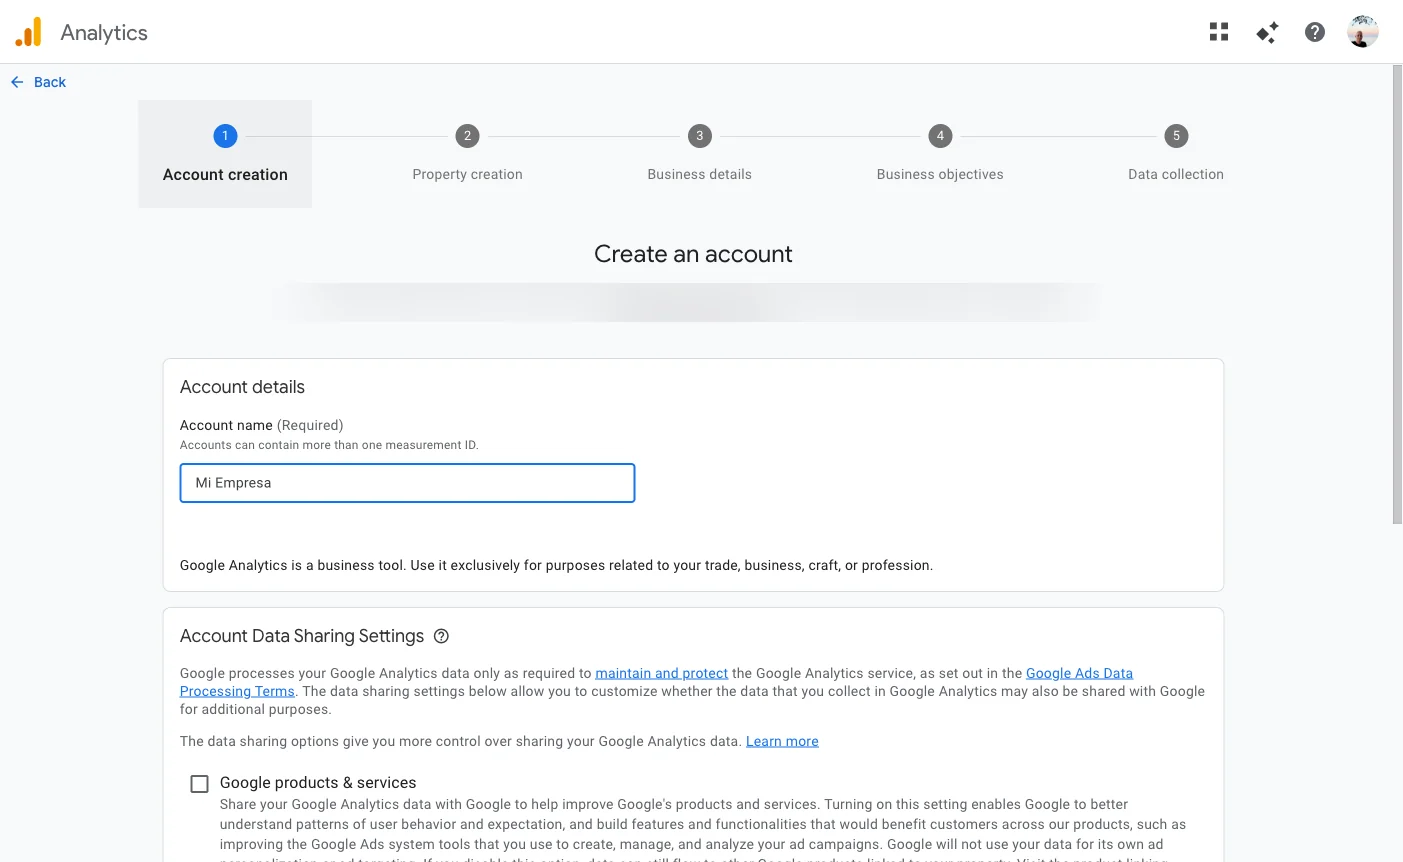
Go to analytics.google.com with your Google account. If it's your first time, you'll see a large button that says 'Start measuring'. Click it. If you already have an account, go to the Admin menu (gear icon bottom left) and click 'Create', then 'Account'.
In the account creation form, type the name of your business or project. This name is only for your own organization, visitors never see it. You can use your brand name.
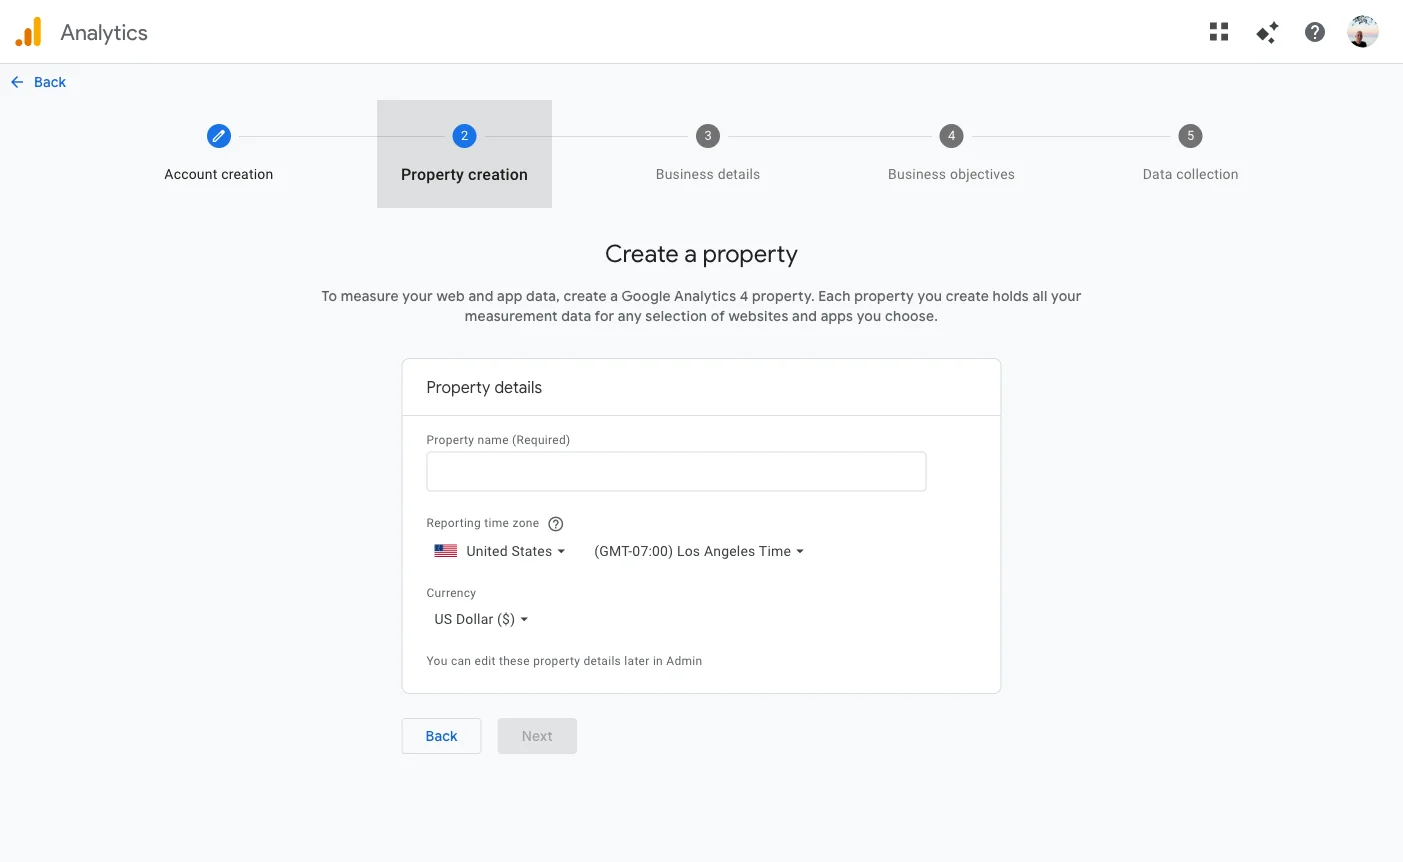
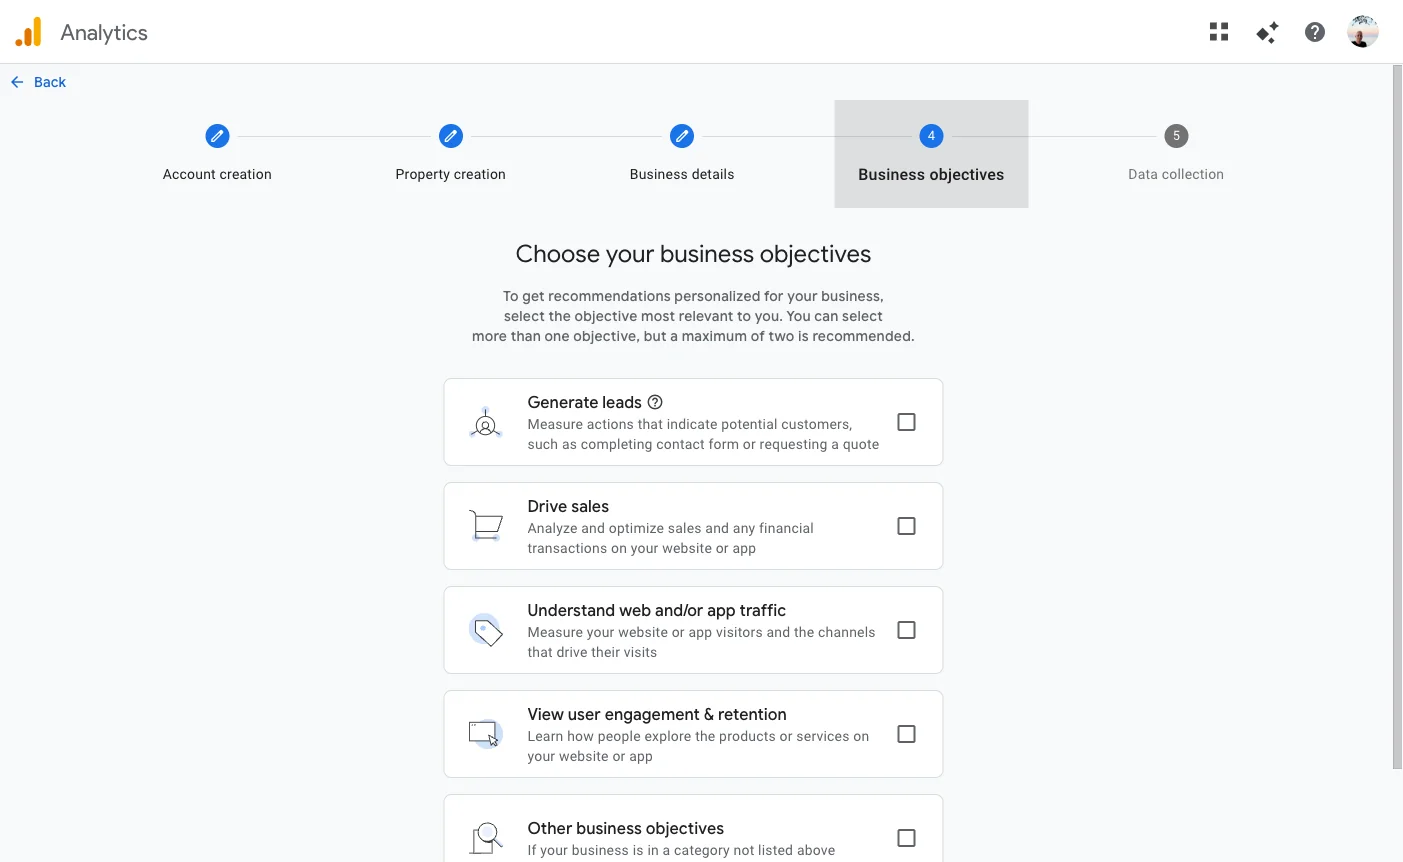
Step 2: Create a property for your website
A 'property' in GA4 is the data container for a specific website. After creating the account, the wizard takes you directly to this step.
- Enter the property name. Use your domain name, e.g. 'mycompany.com'.
- Select your reporting time zone.
- Select your currency.
- Click 'Next'.
The wizard will ask for business details (industry and company size) and your objectives. Select 'Understand web and/or app traffic' if your main goal is to know how many visitors you're getting. This personalizes the reports you'll see by default.
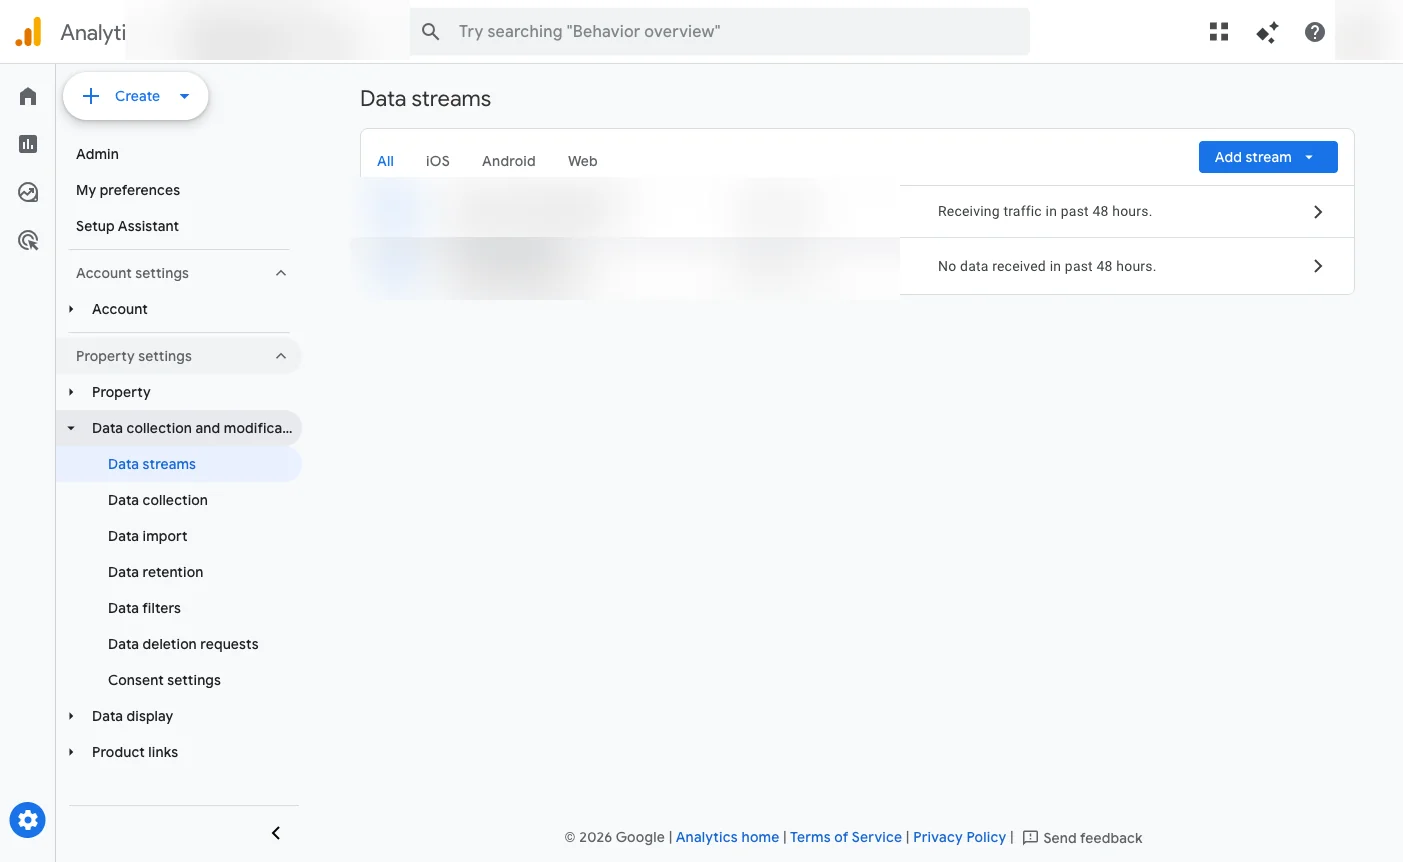
Step 3: Add the tracking code to your website
Once the property is created, GA4 will show you a panel called 'Data Streams'. This is where you connect your website. Click 'Add stream' and select 'Web'.
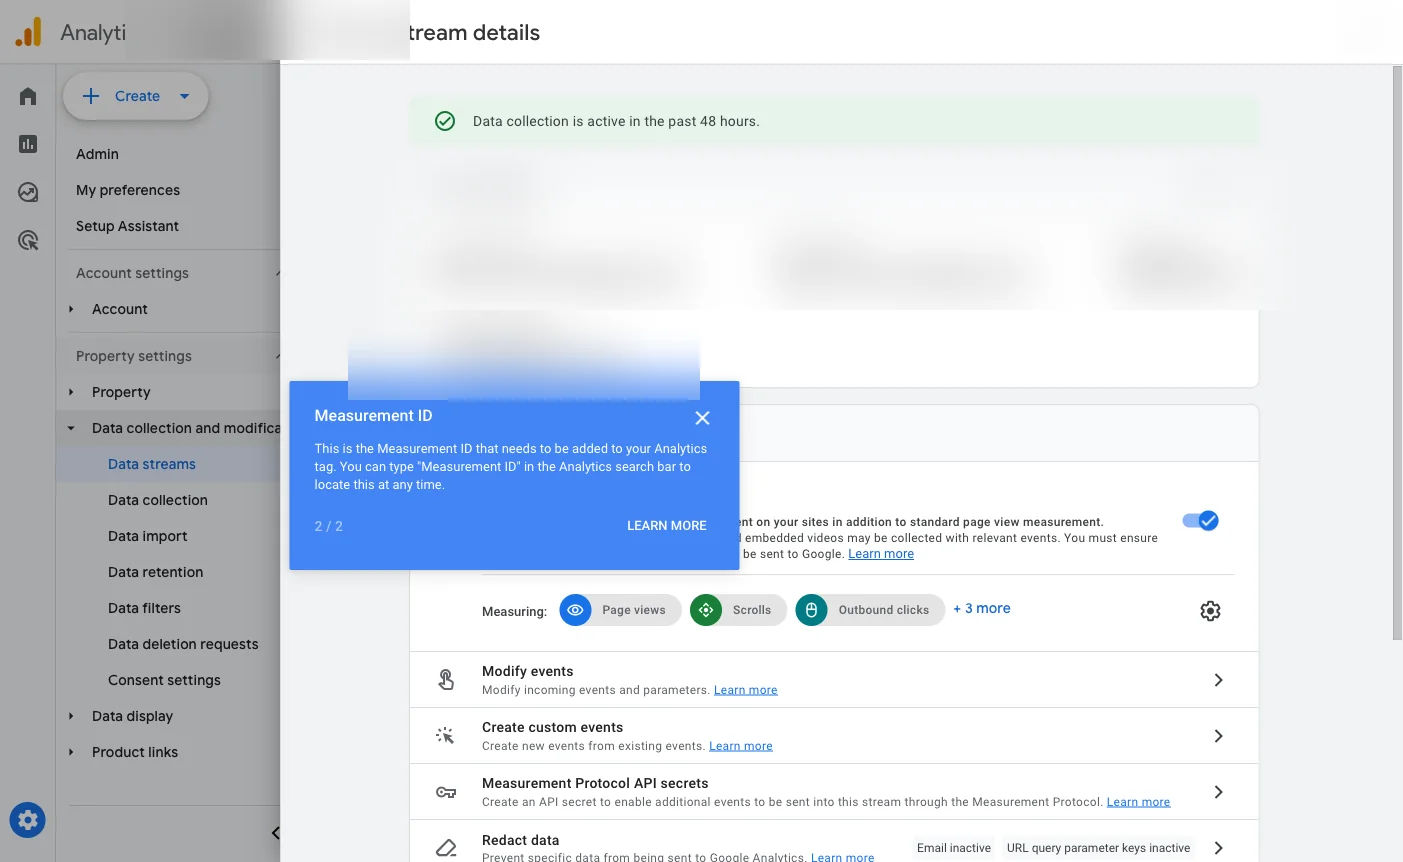
When you open the details of your web stream you'll see the 'Measurement ID', which always starts with 'G-' followed by a string of letters and numbers. This unique identifier is what connects your website to Analytics. Copy it.
If your website is on WordPress
The easiest way is to install the free plugin 'Site Kit by Google'. Go to Plugins > Add new, search for 'Site Kit by Google', install and activate it. The setup wizard will ask you to connect your Google account and will automatically detect your Measurement ID and add it to all pages. No code needed.
If your website is on Wix, Squarespace, or Shopify
These platforms have native integration. Look in their settings panel for the 'Marketing' or 'Analytics' section and paste your Measurement ID (the G-XXXXXXXX code). On Wix: Settings > Marketing tools. On Squarespace: Marketing > Google Analytics. On Shopify: Online store preferences > Google Analytics.
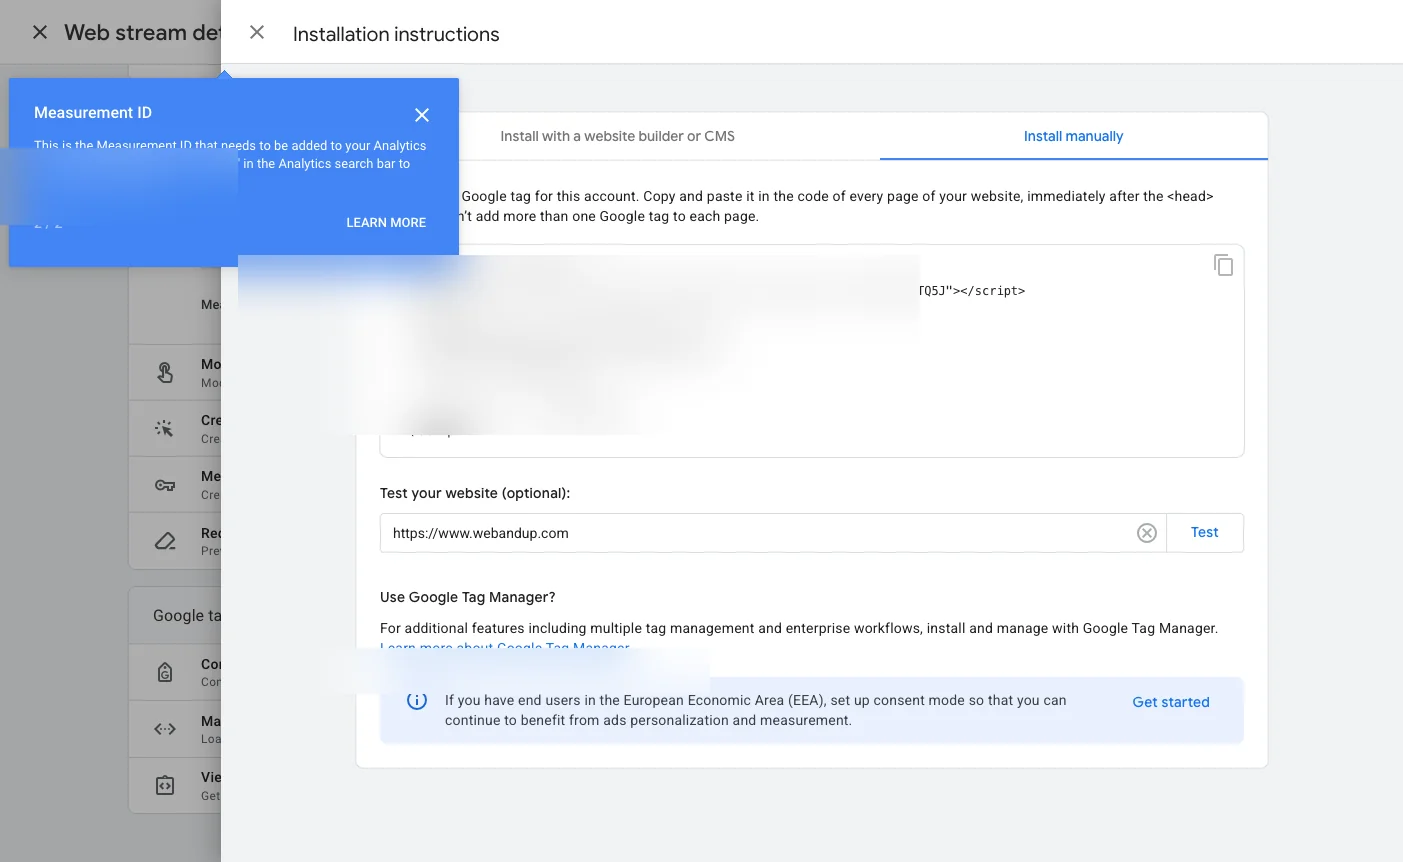
If your website is custom-built (HTML, Next.js, etc.)
Click 'View tag instructions' inside your data stream panel and select the 'Install manually' tab. You'll see a JavaScript code snippet that you need to paste in the <head> of all your website pages.
Step 4: Verify that Analytics is receiving data
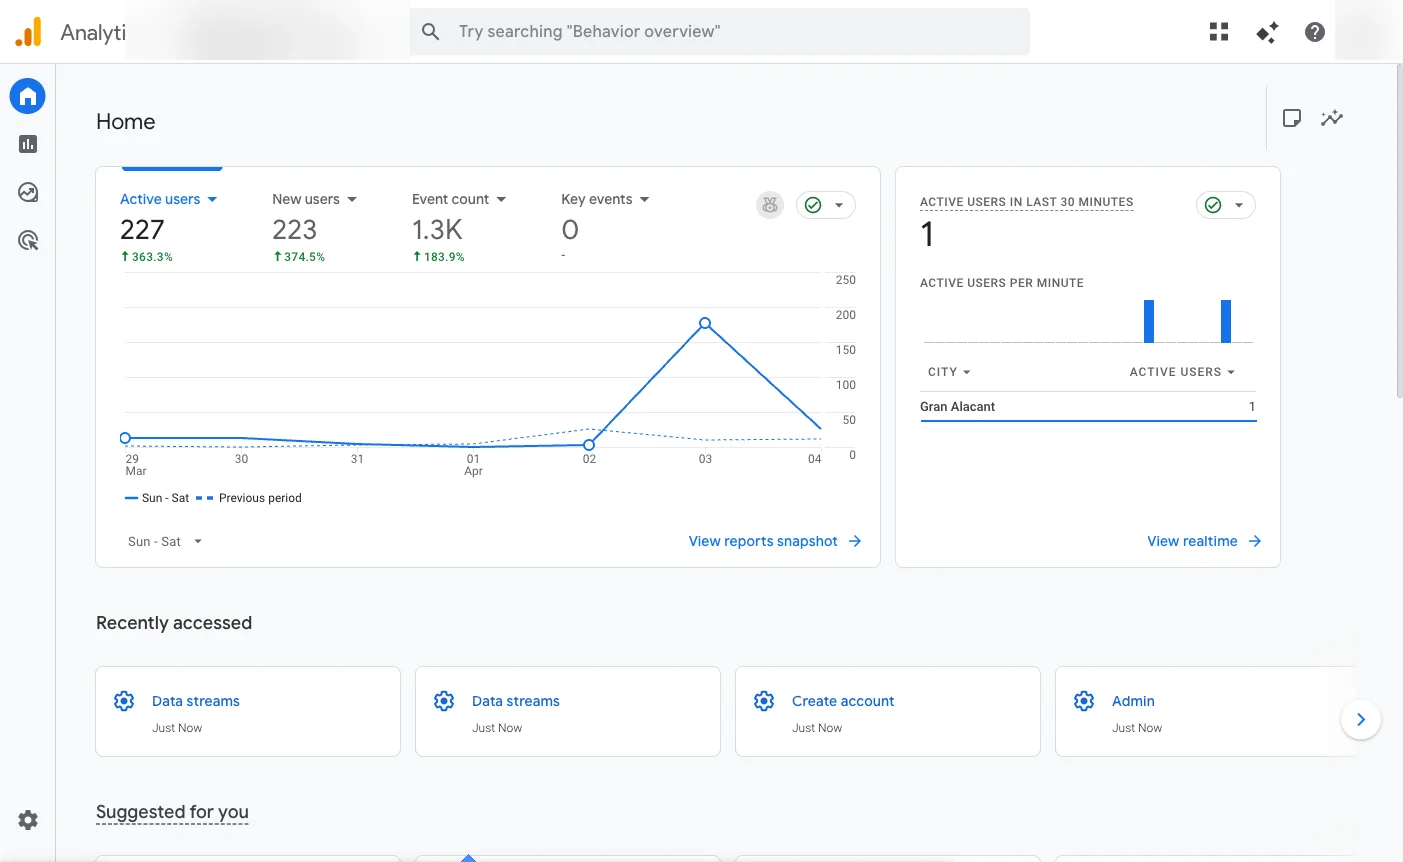
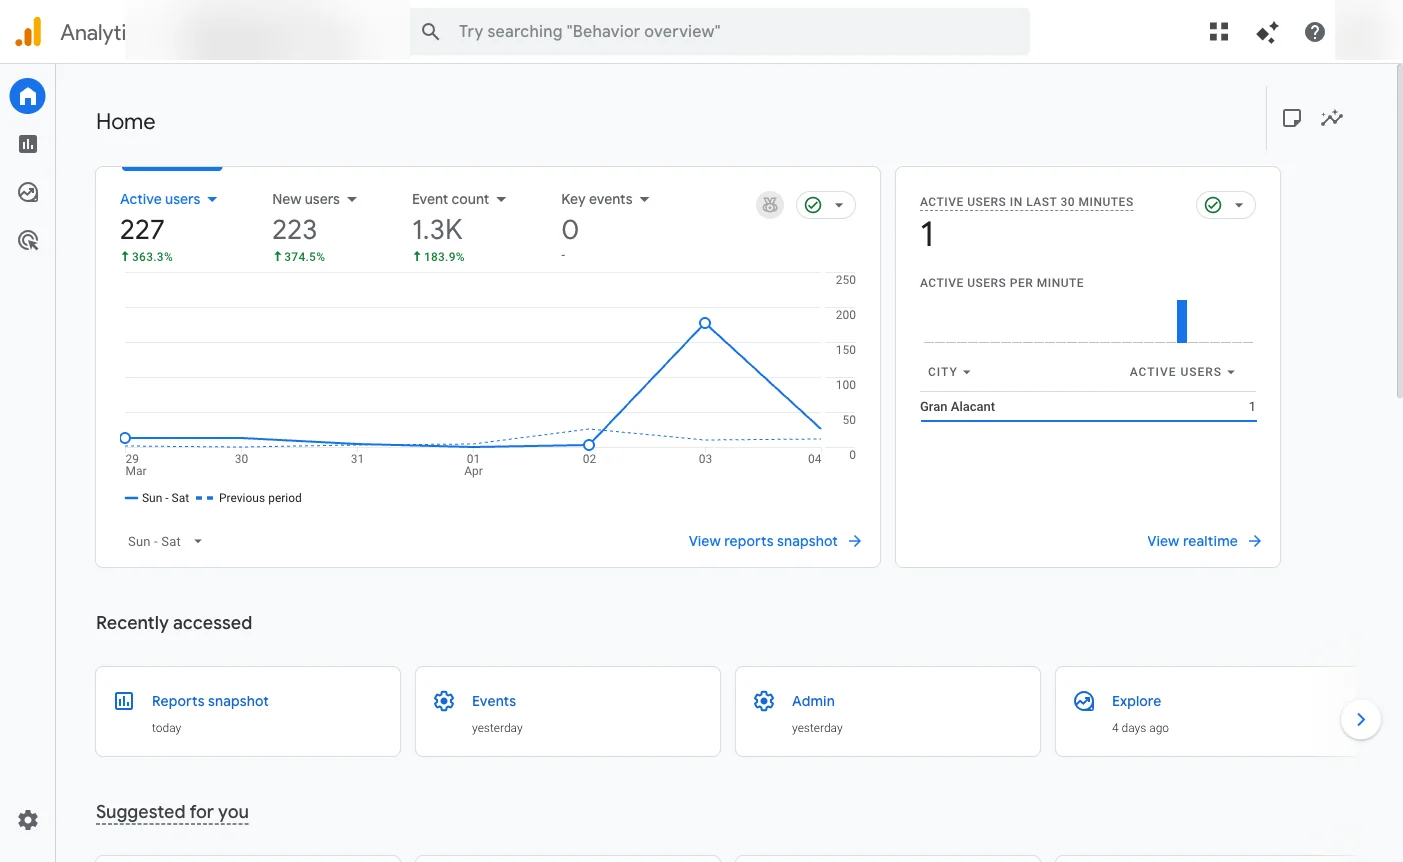
Once the code is installed, go back to Google Analytics. On the main dashboard (Home) you'll see a card showing 'Users active in the last 30 minutes'. Open your website in another browser tab and reload the page. Within 1 or 2 minutes you should see the counter go up to '1'.
If after 5 minutes no data appears, check that the code is in the <head> and not in the <footer>, and that you don't have an ad blocker active in your browser (ad blockers can prevent GA4 from recording your visit).
Step 5: Read your reports and understand key metrics
With Analytics installed, data starts arriving. In the side menu, under 'Reports', you'll find everything you need. These are the metrics that matter most when you're starting out:
- Active users: unique people who visited your website in the selected period.
- New users: visitors coming for the first time.
- Sessions: total number of visits (one user can generate multiple sessions).
- Average engagement time: how long visitors spend on your site on average.
- Acquisition channel: where your visits come from (organic search, social media, direct, email, ads).
- Pages and screens: which pages they visit most and how many times.
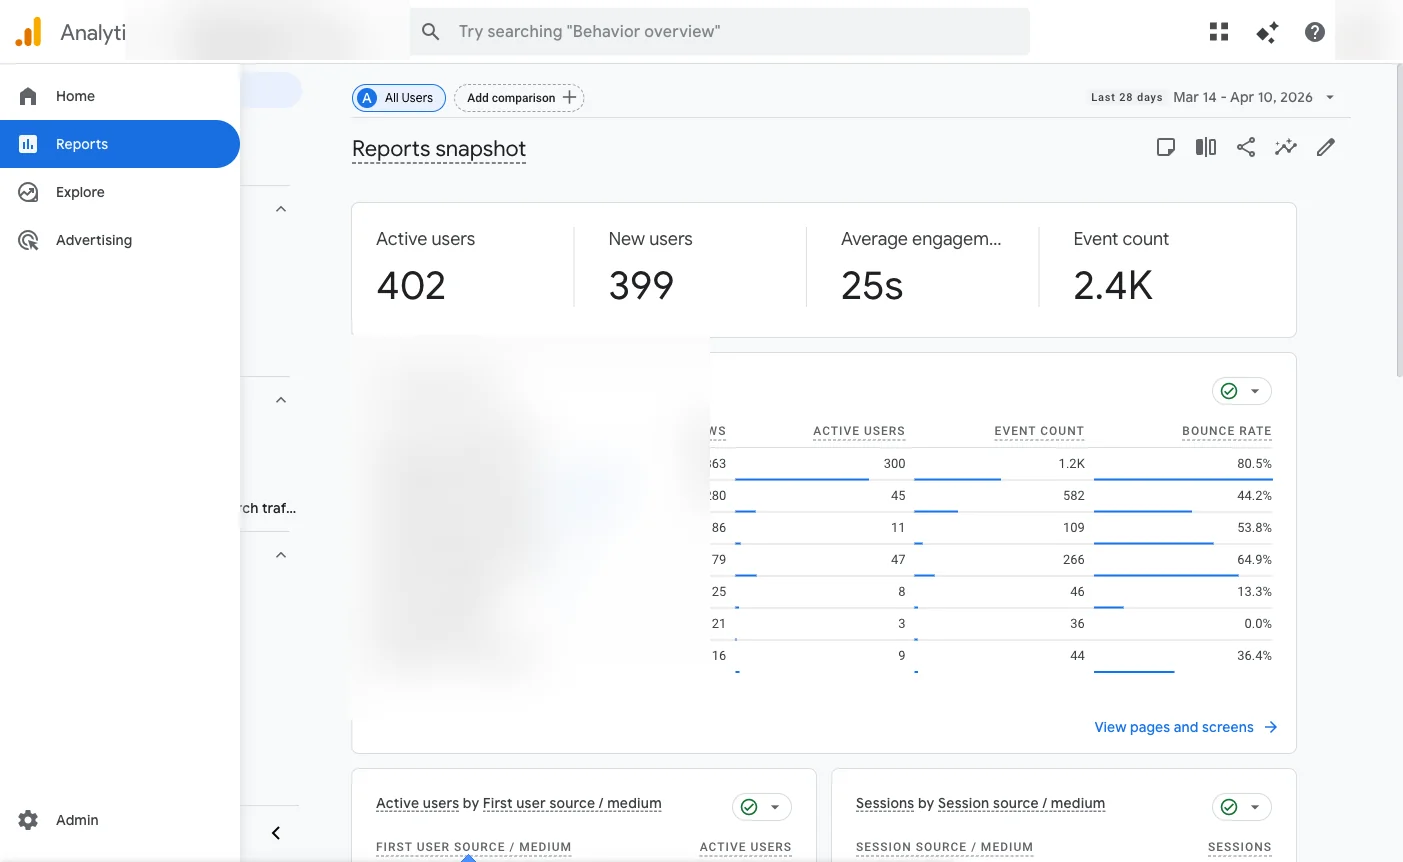
To see where your visitors come from, go to Reports > Life cycle > Acquisition > Traffic acquisition. You'll see a table with all channels and how many users each one brought in the period you select.
What else can you measure? (Advanced analytics)
What you've set up so far automatically measures page views. That's a good start. But there's a much more valuable layer of data that Analytics doesn't record by default: what actions users actually take inside your website.
- Which buttons do they click? 'Contact us', 'View pricing', or 'About'?
- How many users start filling out your contact form, and how many abandon it halfway?
- What percentage of people who view your services page end up asking for a quote?
- How far do they scroll? Do they reach your CTA or leave before?
- From which devices and cities do your leads come, not just your visitors?
This is called event tracking and conversion setup. It requires adding code or configuring Google Tag Manager correctly. With this you can build a complete funnel: from when a user lands on your site to when they contact you or make a purchase.
Want to know which buttons your users click, where your leads come from, and which pages they abandon before getting in touch? We set up advanced analytics for your website, with event tracking, form tracking, and complete funnel measurement. No technical hassle for you.
Frequently asked questions
Is Google Analytics free?
Yes. Google Analytics 4 is completely free for most websites. There is a paid version called Analytics 360, designed for large enterprises with millions of monthly visits, but almost no one needs it.
How long does it take for data to appear?
Real-time data appears within seconds. Standard reports may take 24 to 48 hours to show complete data from the previous day. That's normal: GA4 processes and consolidates the information before displaying it.
Do I need to inform users that I use Analytics?
Yes. If your website has visitors from the European Union, you are required to inform them and, in many cases, request their consent before activating tracking. This is managed with a cookie banner and a privacy policy. If you don't have this set up, you should do it as soon as possible.
Can I have Analytics on multiple websites?
Yes. You can have multiple properties in the same Google Analytics account, one per website or app. Each property has its own Measurement ID and its own completely separate data.
What's the difference between GA4 and Universal Analytics?
Universal Analytics (UA) was the previous version. Google retired it in July 2024. If someone mentions 'Google Analytics' with an ID starting with 'UA-', that no longer works. Only GA4 exists now, which is what we configured in this guide.